
Chapter 16
From Plan to Ready‑to‑Run
Production 3P is where the conceptual production plan becomes a real, ready-to-run system. Instead of focusing on product design or abstract value stream maps, the work shifts to designing the physical layout, material and information flow, standard work, and the staged ramp‑up that will bring the system to life. The aim is not just to install machines — it is to ensure the line or cell is safe, efficient, and capable of a smooth vertical start‑up.
In practice, Production 3P is often run as a series of mini‑events rather than one big workshop: one for layout and material flow mockups, one for standard work and information flow, and one for pilot builds and tuning. This chapter provides plays for each of those stages.
Section 16.2
When to Run Production 3P
Production 3P should be scheduled when product design is essentially frozen, key process choices and major equipment directions are decided, but detailed layout and support systems are still flexible. The organisation is approaching pilot builds and ramp‑up.
- Too early: Process choices and the production plan are still in flux — that is Process 3P work. Running Production 3P now means designing a layout around decisions that will change.
- Right time: There is still room to experiment with layout, material presentation, information flow, and staffing on tape and cardboard — before concrete and steel.
- Too late: Equipment is already installed and the layout is hard to change. The event can only work around fixed decisions.
Surface and resolve issues while the system is still on tape and cardboard, not concrete and steel.
Section 16.3
What Production 3P Must Deliver
Production 3P is successful when it delivers a system that operators can run safely, efficiently, and repeatedly from day one — not one that requires weeks of firefighting to stabilise.
Required outputs
- A tested layout and material flow that support takt, quality, ergonomics, and flexibility
- A practical PFEP (Plan for Every Part) and water spider routes that keep operators supplied without hunting
- Designed information flow, poka‑yoke, and standard work for each station
- A vertical start‑up plan with phased ramp, pilot builds, and a production readiness checklist that is actually used
Play PR0
Plan the Production 3P Mini‑Events
Purpose
Structure the work across three linked events
Clarify that Production 3P will run as a set of linked mini‑events over several weeks rather than a single day. Each event has a clear scope, objectives, and expected outputs — linked explicitly back to the production plan from Process 3P.
Event A
Line / cell layout and material flow mockup
Design the physical layout on tape and cardboard. Run SORK cycles. Finalise supermarket locations and water spider routes.
Event B
Standard work, visual instructions, and information flow
Write standard work combination sheets with operators. Design poka‑yoke and quality checks. Define production control and variant identification.
Event C
Pilot builds and vertical start‑up tuning
Run trial builds with early parts. Walk through each phase of the vertical start‑up plan. Capture remaining issues and close them before volume ramp.
Gather inputs and build the team
Prepare the inputs that the team needs to design rather than guess: the final or near‑final product design and BOM, future-state value stream maps and production plan from Process 3P, selected process alternatives and key capital decisions, facility constraints (space, utilities, safety and ergonomic standards), and prototypes or early parts for trial builds if available.
Include line supervisors, operators who will actually run the line, process and manufacturing engineers, material and logistics planners (including the water spider designer), maintenance, quality, and a safety and ergonomics specialist. If the people who will own the line are not in the room, the output will not stick.
Play PR1
Design Layout and Material Flow
Purpose
Translate the future-state value stream into a physical layout operators can use
Starting from the future-state value stream, design the physical layout: decide number of lines or cells, choose shapes (straight, U-cell, or other) based on flow and ergonomics, place supermarkets and inspection points, and plan routes for incoming and outgoing materials.
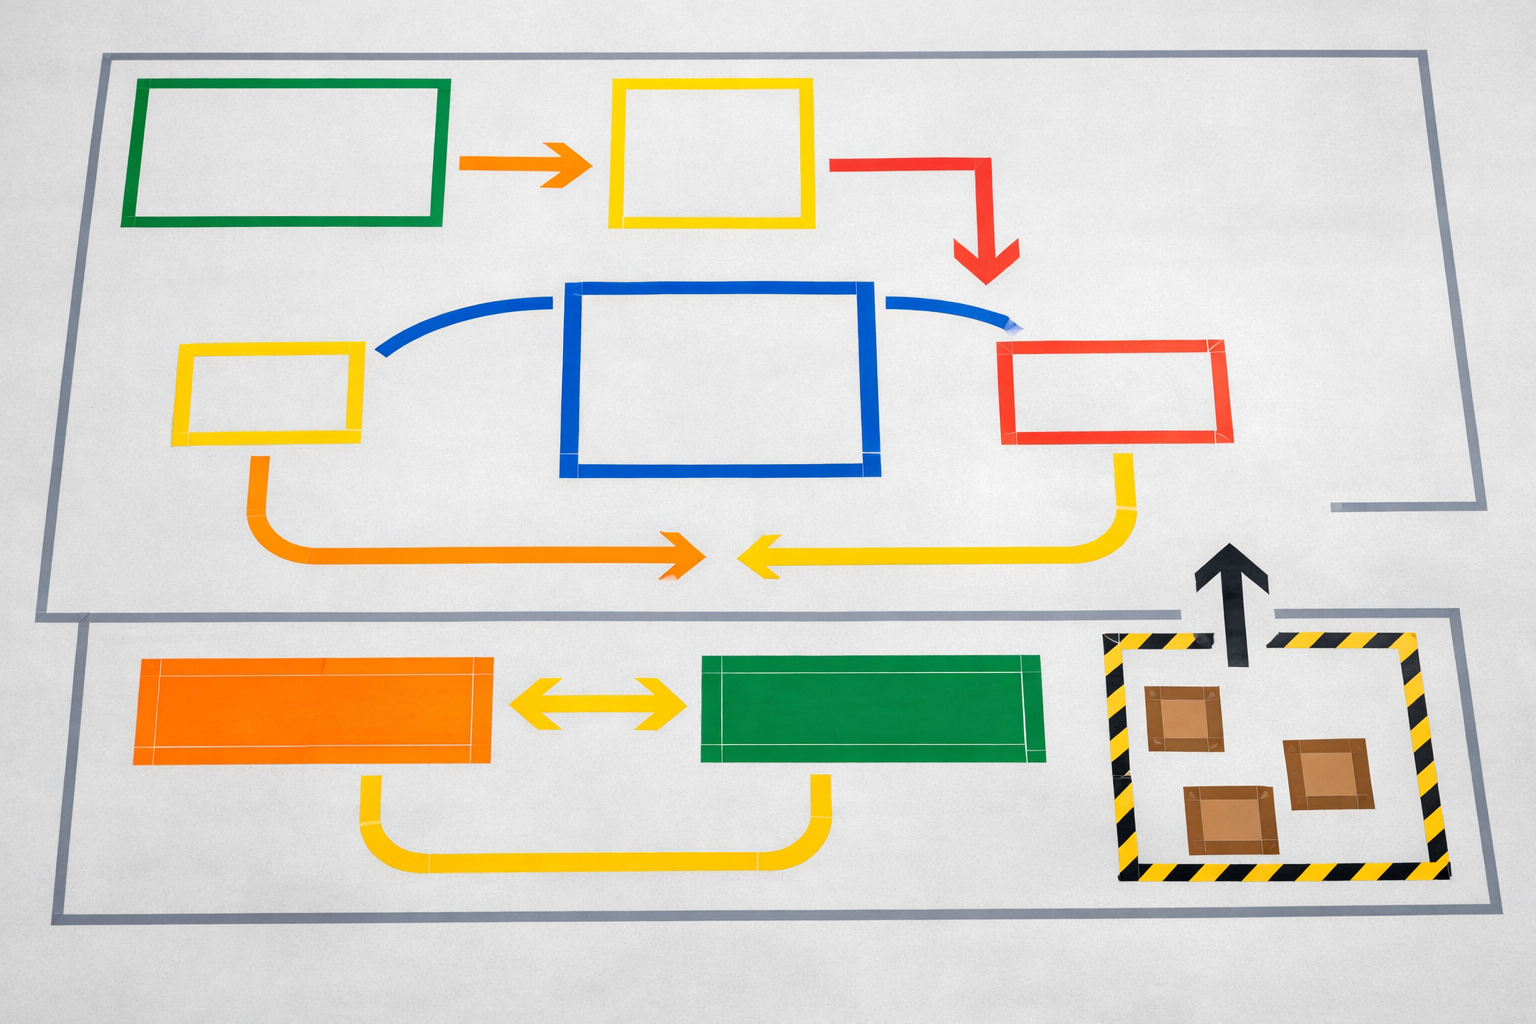
Build and test layout concepts with mockups
Use simple tools — tape on the floor, cardboard boxes, scaled drawings — before committing to anything permanent. Run “Air Guitar” and SORK (Simulate–Observe–Kaizen–Repeat) cycles: walk the process, simulate operator motions, observe issues, improve, and repeat. The goal is to learn fast and cheap before equipment is installed.
Design PFEP — Plan for Every Part
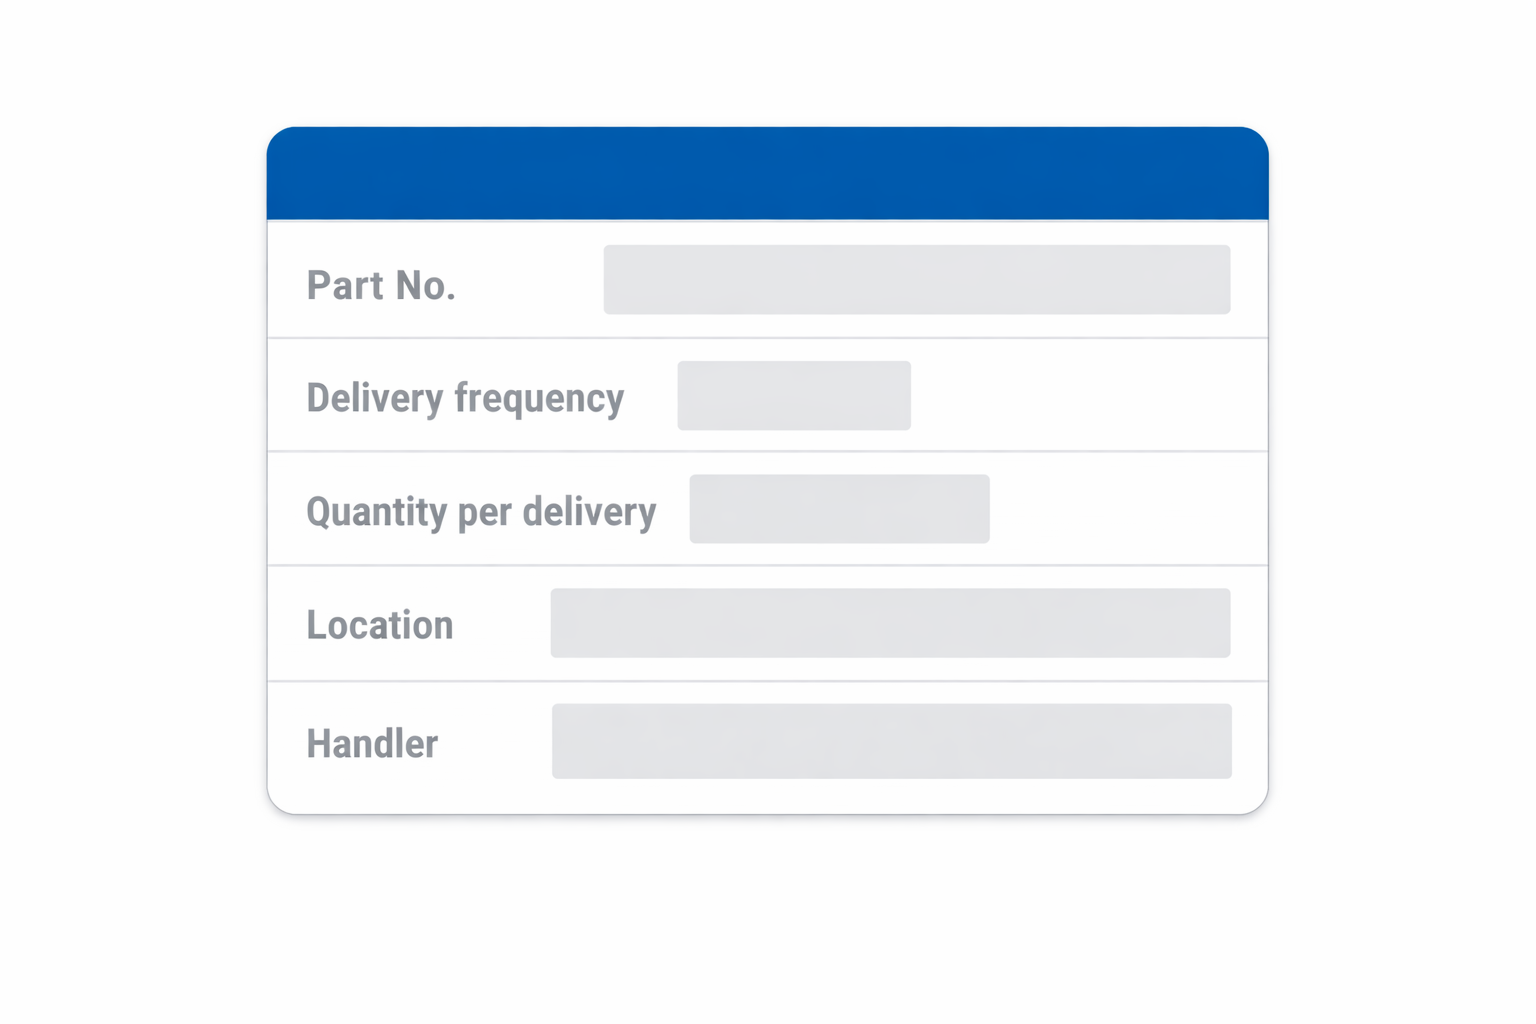
Create a Plan for Every Part that specifies, for each part: delivery frequency (e.g., every two hours, once per shift), quantity per delivery (standard container size), storage and supermarket location, reorder point or trigger, who delivers it (e.g., water spider), and identification (label, colour, bin number).
PFEP ensures that material flow is designed, not improvised, and that operators are never left hunting for parts.
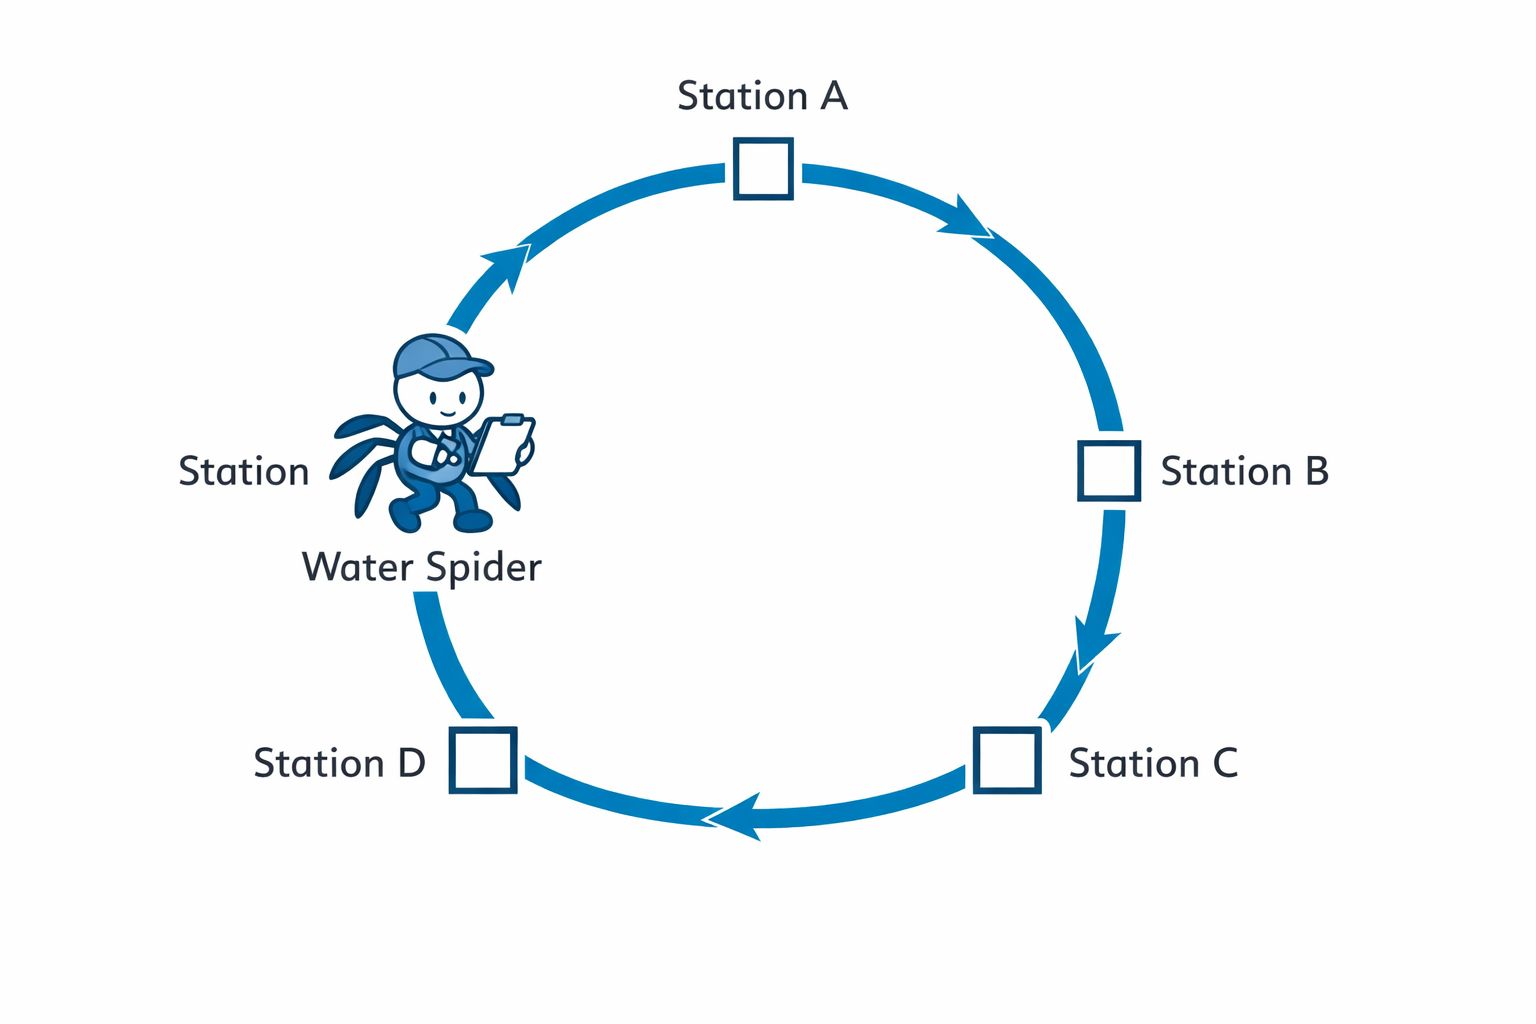
Design water spider routes
Design a standard route and schedule for the material handler that specifies: starting and ending points (often the supermarket), sequence of stations visited, standard quantities delivered and picked up at each stop, and typical route time (for example, a 10–20 minute loop). Mark the route visibly on the floor and in PFEP documents. This stabilises material flow and frees operators to focus on value‑adding work.
Play PR2
Design Information Flow, Quality, and Standard Work
Purpose
Make the right way to work the easiest way to work
Design how operators know what to build and how to build it, embed quality checks close to where defects can be introduced, and document standard work with operators — not after the fact.
Design information flow to the station
Define how operators know what to build and how to build it at all times. Choose a production control method — kanban, heijunka box, simple electronic display, or paper travelers — and design variant identification (colour coding, labels, barcodes on parts or totes, visual signals for next variant) so they are easy to see and understand at a glance, minimising reliance on memory or verbal instructions.
Build quality into the process (poka‑yoke)
Embed quality checks and error‑proofing close to the steps where defects can be introduced: fixtures that only allow correct part orientation, go/no‑go gauges at critical steps, and simple visual standards for appearance, configuration, or torque states. Place checks where they prevent defects, not at the very end of the line.
Define standard work and visual instructions
Document standard work for each station: sequence of steps, time for each step relative to takt, material and tool locations, and safety and quality checkpoints. Summarise this in standard work combination sheets and Yamazumi charts to balance workloads, and in visual work instructions with photos or simple drawings using minimal text. Involve operators heavily in creating and testing these standards — standards written without operators are rarely followed.
Play PR3
Plan and Run Vertical Start‑Up
Purpose
Ramp in stages — learn and stabilise at each phase before moving on
Rather than turning everything on at once, design a staged ramp‑up that surfaces and closes issues at each phase before cascading failures make them harder to diagnose.
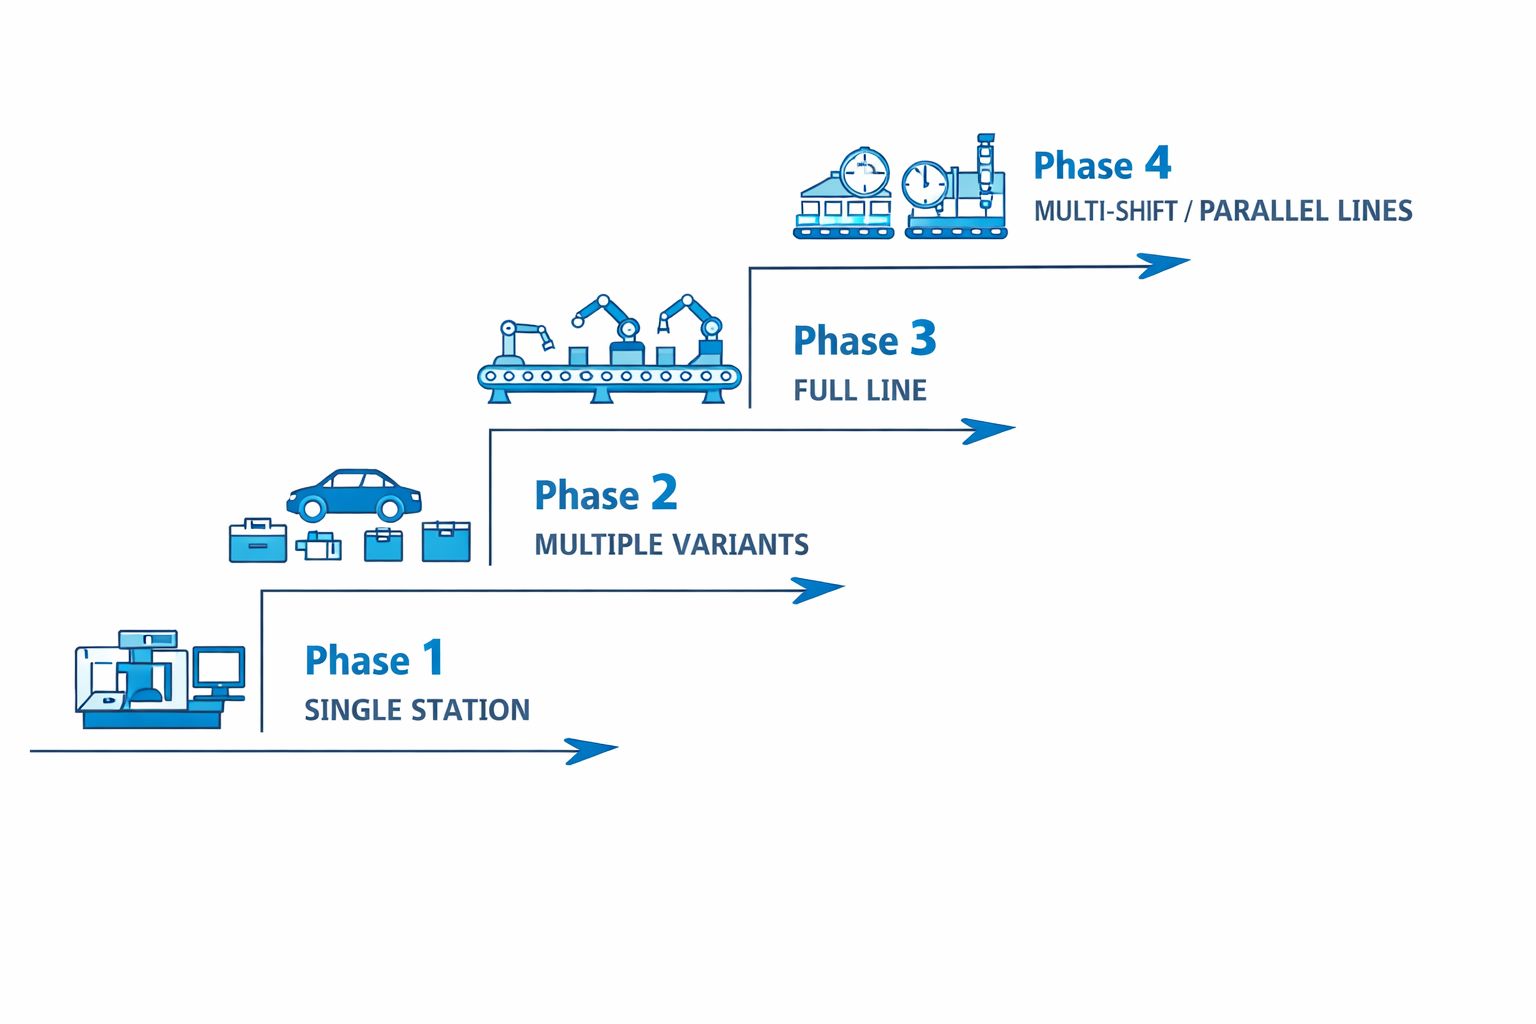
Phase 1
Single station, single variant
Install and run one station with one product variant. Verify material flow, standard work, and quality checks before introducing any additional complexity.
Phase 2
Single station, multiple variants
Keep the station running and introduce additional variants. Test information flow and changeover capability. Close issues before expanding to the full line.
Phase 3
Full line, first shift
Connect multiple stations into a line or cell. Run pilot builds over a full shift. Monitor flow, quality, and ergonomics. Resolve issues before adding shifts.
Phase 4
Additional shifts or parallel lines
Scale staffing, supervision, and support systems as needed. Confirm that each shift can run independently using standard work and visual management.
Use a production readiness checklist
Before moving from one phase to the next, check readiness explicitly. Do not advance the ramp‑up stage if major items on the checklist are clearly not met — capture issues and actions and hold the phase until they are resolved.
Product
- BOM finalised; variants understood
- Critical characteristics defined and communicated
Process
- Key operations validated; known issues addressed
- Capability acceptable at targeted quality level
People
- Operators trained; standard work practiced
- Staffing plan in place for each phase
Logistics
- PFEP and water spider routes working
- Supermarkets and replenishment functioning
Safety & Quality
- Risk assessments done; controls in place
- Tests defined and poka‑yoke devices working
Section 16.8
Connections Back to Earlier 3P Work
Production 3P turns the production plan and process choices from Process 3P into a working system. Simplifications and design changes from Design 3P show up here as fewer parts, clearer interfaces, and more robust work content — which makes layout, PFEP, and standard work easier to design.
In turn, the learning from pilot builds and ramp‑up can feed back into both process design and future product development as part of the organisation’s knowledge base. The three events — Design, Process, and Production 3P — are not separate projects; they are a single learning arc from concept intent to operational reality.
What you learn during vertical start‑up is the most valuable input you can give to the next generation of product and process design.
Section 16.9
Common Traps in Production 3P
Naming these traps at the beginning of Production 3P helps the team design around them.